Vector illustration with Lighting Effects
A course by Marmota vs Milky, Creative Studio


Learn how to style and give personality to your vector illustrations with lighting effects in Adobe Illustrator

Light is an essential element in the creation of vector illustrations. Through light, it's possible to alter our perception of the space, objects, and characters represented graphically. Carlos and Fabi, founders of the creative studio Marmota vs. Milky, are all too familiar with the effect that proper lighting can have on their pieces and have collaborated with big names such as Adidas, Burger King, Nike, Ray-Ban, and more.
In this course, learn to create vector illustrations in Adobe Illustrator with different lighting effects. Join your teachers to explore lighting techniques and visual tools for adding value to your work and making sure it stands out from the crowd.
Now would also be a good time to take a look at Marmota vs. Milky's first Domestika course, Adobe Illustrator: Vector Illustration from Scratch, in which they teach you to master the software and create professional graphic pieces.
What will you learn in this online course?
15 lessons & 21 downloads
What's included in this course?
Start by getting to know Carlos and Fabi and how they came to join professional forces under the name Marmota vs. Milky. They share some of their most prominent works and biggest influences such as Thai artist James Jean and Japanese artist Takashi Murakami.
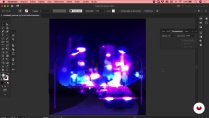
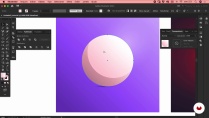
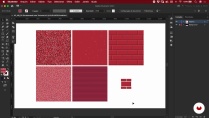
Study the RGB and CMYK color systems, absolute black, and the essentials for creating lighting effects for both digital and printed works. Explore Illustrator's tools and panels and discover how to give your illustration depth of field, cast shadows and reflections, as well as add texture.
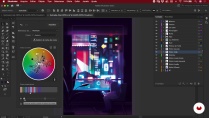
After creating a mood board of reference materials, do some initial sketching to try out different composition options before choosing your favorite. Now it's time to move to Adobe Illustrator! Create the basic lines for vectorizing your design, put together a color palette, add the lighting effects you learned before, and put the finishing touches on your piece.
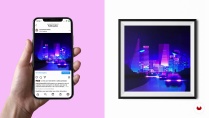
Learn to convert and export your artwork for printing or publishing on social media. Carlos and Fabi also give you some tips on producing vector mock-ups that can be used in your portfolio. By the end of the course, you'll be creating powerful and original vector illustrations.
- 100% positive reviews (96)
- 1,856 students
- 15 lessons (2h 25m)
- 21 additional resources (10 files)
- Online and at your own pace
- Available on the app
- Audio: Portuguese
- Portuguese · Spanish · English · German · French · Italian · Polish · Dutch · Turkish · Romanian · Indonesian
- Level: Beginner
- Unlimited access forever
Recommended software & tools for this course
 Adobe Illustrator
What is this course's project?
Make a vector illustration of an urban scene focusing on lighting, depth of field, and elements for making it more dynamic.

Projects by course students


Who is this online course for?
Illustrators, designers, artists, and anyone wanting to learn new vector illustration techniques to enrich their creative repertoire.
Requirements and materials
Basic knowledge of Adobe Illustrator is essential for this course.
In terms of materials, you need pencils, paper, a scanner or a camera, and a computer with access to the most recent versions of Adobe Ilustrator.

Reviews
Marmota vs Milky
A course by Marmota vs Milky
Carlos and Fabi are visual artists from Sao Paulo, Brazil, with studies in industrial design and degrees in visual programming from UNESP (Sao Paulo). Since 2012, they’ve been working as independent artists under the pseudonym Marmota vs Milky.
The duo uses creative problem solving to generate ideas and finds inspiration in just about any artistic medium. Due to their Japanese heritage, they also mix their culture with Western influences to explore different perspectives.
Fabi and Carlos have created illustrations for advertising campaigns, animated characters, customized products, and more. Their clients include Adidas, Ben & Jerry's, Burger King, Faber Castell, Havaianas, Hyundai, Nike, Pixel Show, and RayBan.
Content
-
U1
Introduction
-
Presentation
-
Influences
-
What will we do on the course?
-
-
U2
Setting the stage: techniques and resources for drawing light
-
Converting RGB to CMYK and Absolute Black
-
Creating Light in Illustrator
-
highlighting with depth of field
-
Projecting shadows and reflection
-
enriching with textures
-
-
U3
Hands-on: our creation process
-
Reference Search
-
quick sketch and definition
-
vectorization
-
Colors and Effects
-
Final art
-
-
U4
Finishing touch: the archive for print and digital media
-
Exporting Prints
-
Exporting to social networks
-
-
FP
Final project
-
Vector illustration with Lighting Effects
-
What to expect from a Domestika course
-
Learn at your own pace
Enjoy learning from home without a set schedule and with an easy-to-follow method. You set your own pace.
-
Learn from the best professionals
Learn valuable methods and techniques explained by top experts in the creative sector.
-
Meet expert teachers
Each expert teaches what they do best, with clear guidelines, true passion, and professional insight in every lesson.
-
Certificates
PlusIf you're a Plus member, get a custom certificate signed by your teacher for every course. Share it on your portfolio, social media, or wherever you like.
-
Get front-row seats
Videos of the highest quality, so you don't miss a single detail. With unlimited access, you can watch them as many times as you need to perfect your technique.
-
Share knowledge and ideas
Ask questions, request feedback, or offer solutions. Share your learning experience with other students in the community who are as passionate about creativity as you are.
-
Connect with a global creative community
The community is home to millions of people from around the world who are curious and passionate about exploring and expressing their creativity.
-
Watch professionally produced courses
Domestika curates its teacher roster and produces every course in-house to ensure a high-quality online learning experience.
FAQs
This course is designed for those with basic digital illustration or Illustrator skills at an intermediate level. You don’t need to be an expert, but you should be comfortable with the software’s core tools.
You’ll need Adobe Illustrator installed, plus a compatible computer or tablet. A drawing tablet can help but isn’t required. Basic Illustrator knowledge is recommended.
You’ll learn advanced techniques in lighting, shadows, reflections, depth, textures, character creation, minimalist composition, exporting for print and social media, and developing your own visual style.
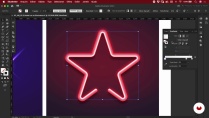
Yes, the course covers techniques for creating realistic light effects like gradients, neon, lens flare, spotlights, trails, and adjusting light intensity in Illustrator.
Yes, you’ll learn how to set up files for print (CMYK, bleed, rich black) and digital export to ensure quality across all platforms.
Yes, the course teaches how to create vector characters, develop visual concepts for events, and customize products with illustrations.
You’ll learn to distill elements using basic shapes, exploring minimalism and graphic synthesis to create striking, cohesive illustrations.
 Adobe Illustrator



EN ESTE CURSO HE APRENDIDO COSAS QUE EN NINGUN OTRO CURSO DEILUSTRATOR HABÍA APRENDIDO
Super Kurs, Danke.
Achei o curso muito bom para explorar novas possibilidades no uso dos blend modes nas minhas ilustrações. Recomendo!
obrigado pelo ótimo curso
Carlos and Fabi really nailed it when dialing in on precision based tasks applicable to Illustrator. For a very long time I struggled with making exact adjustments, and after watching a few sections, I was off and running. Good job!!!